Saturday 31 January 2015

Crafty tutorial- crochet hook case.

Afternoon guys! :)
I've been a busy little bee today, making a crochet hook case (and attempting to write a tutorial that makes sense). So here goes...

Grab your fabric, (size doesn't matter really as long as it is big enough for what you are intending to put in it.)


Fold over, and cut along the line, when you unfold you should have a triangle shape at the top . Cut down the middle of the triangle, you should have two half triangles

(ignore my shape, i did it wrong ) 

Fold with the pattern on the inside, sew around the edges and hem the triangle flap. Sew on a snap button and Et voila!


A cute crochet hook case!

Or a glasses case

Pencil case

Or scissor caddy :)

Thee you have it :) now if none of it makes any sense at all, let me know and i'll see if i can figure it out!haha :) 


Sunday 25 January 2015

Grow Your Own Blog Party

Morning! Today i am attempting to figure out how to do this Grow your own blog party.
Apparently you say a little about yourself and what you like to do...so here goes!


I'm Sophie, The Undomestic Diva, chronicling how i (attempt) to manage my home.

I LOVE to bake and cook (They don't always turn out right...)

I love sewing (when my machine lets me, otherwise it's back to sewing by hand!)


And i LOVE trying out new crafts (again, they don't always turn out right haha :) )

So leave a comment, say hello, and i'll pop on over and return the favour :)


Saturday 24 January 2015

Make your own taper candles

Hi guys!
Sorry i haven't been around for a few days, have been busy, busy, busy, BUT i do have a new craft I've been trying out... Say hello to taper candles!
Now, these ARE easy to make, but they take quite a lot of time.

Grab a length of cotton string or yarn, this is going to be your wick. tie a couple of bolts or anything small but heavy to the bottom, this acts as a weight until the wick is a bit stiffer, melt your wax (my favourite to use is the one over there ----->)   in a tall pan, now the pan you use cannot be used for food prep after this (for obvious reasons haha) so make sure its one you don't like very much, and pop it on top of another pan of boiling water, this is essentially a double boiler. Take an old spoon and stir to make sure all the wax is melted, pinch the middle of your wick so it is double sided and dip it onto the wax, now, do not pause as you dip or obviously the wax will melt right back off!
Now hand it up on to a pair of nails like mine, or anywhere that you can. and give it a minute or two to harden up, then dip again!
Keep going like this until you get the thickness you would like, snip the wick in the middle of your two candles and voila!
Light and enjoy!


Sorry for the blur, they were swinging a little and my camera has a super slow shutter speed!

When making your candles, once they are a little drier you can smooth them out by just rubbing between your hands.
 For these candles i used an old candle for the wax so it kind of looks like earwax, but yours will look nicer! :)

Saturday 17 January 2015

Skirt to pants


Evening guys! :)
Well, ive had a pretty productive day, i've made a new pair of 3/4 pj's from an old skirt that i never wore. I completely forgot to take pictures as i was making so i'll just have to tell you, to be honest it's a pretty easy one!


Grab your skirt, (you can use any length you like, but remember that obviously the longer the skirt you use the longer your pants will be!) A maxi skirt is the perfect length for this, turn it inside out and sew up, over and down the other side in the middle of the skirt (you'll want quite a baggy comfy feel so get as much in the middle as possible) cut up the middle so it creates a seam, turn right way out and voila! A pair of comfy pj's!
As it is made from a skirt it will already have a hem on the bottom and the waistband so it really is super quick and easy to do :)

 I also attempted to make some fudge brownies but they went hideously wrong! (Don't ask how as it was such an easy recipe!)


And i made sweet and our chicken (leftover from the roast we had yesterday) with rice in my new steamer courtesy of my uncle John :) i'm pretty sure from here on in everything will be cooked in this, because it is a gadget (i love gadgets!) and the rice came out absolutely lovely and perfectly cooked!


I shall be adding more to the home hints series ASAP :)


Follow me on bloglovin

<a href="http://www.bloglovin.com/blog/13483005/?claim=y4atk75ftcr">Follow my blog with Bloglovin</a>

Thursday 15 January 2015

Scrummy Apple Crumble.

Evening all! :)
I have been cooking up a storm this afternoon making homemade lasagna and apple crumble. Yum!

I have been using my new gadget, the JML Multi Chef, bought for the bargainous sum of 2 whole pounds at my local salvation army shop (an Aladdin's cave of treasure!) it comes with lots of fun attachments such as a lemon squeezer, egg separator, 4 different graters and slicers, a paddle, and a chopper. i had lovely thinly sliced crispy potatoes with my lasagna and rings of apples to go in my crumble  (For the record, i think normal chopped apples taste much nicer in a crumble, i just wanted an excuse to use a gadget!haha)
I apologize in advance for the awful picture quality, i am stuck with a cheap compact camera as the one on my phone is broken.

So, apple crumble.

You will need:

150g plain flour
200g porridge oats (adds a lovely texture)
30g sugar ( either is fine)
100g butter
Pinch of cinnamon and/or nutmeg to taste

Lets Get Started!


Peel, core and chop your apples, sprinkle on a smidge of sugar (white or brown, either is yummy!)
Pop apples in a  pan and cover with water, stew until soft. Also i kept my peel on as a texture preference

Combine dry ingredients in a mixing bowl, add butter and rub together until mixture resembles quite chunky breadcrumbs.

When apples are soft, spread over the bottom of a pie dish, add sultanas at this stage if you like, and sprinkle over a pinch of nutmeg/cinnamon

Spread over the crumble mixture

Pop into the oven for 30-35 minutes until crumble in golden (Don't do what i did and almost forget about it. Saved this one in the nick of time!)


Add cream/ice cream/custard (or if you really want a taste sensation all 3!) and enjoy with a cuppa!


Wednesday 14 January 2015

Cooking With Lemons


I love lemons, not so much IN food, such as lemon drizzle cake etc but i love COOKING with lemons they add a lovely tang without being too over bearing.


Do you have any tips on cooking with lemons? comment or email me and i'll be sure to add it to the list :)

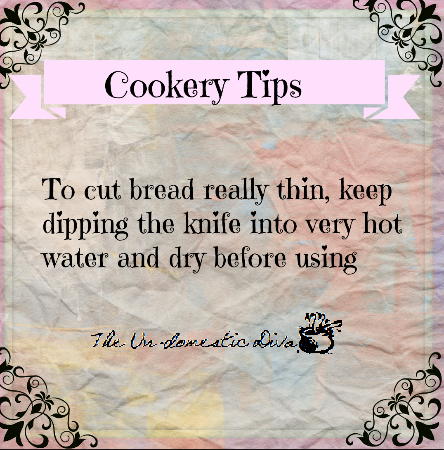
Cookery Tips

Evening all! Just for you i have been compiling lists (with pretty pictures) of cookery tips that i have come across on my travels in my un-domestic world.
I shall be starting a full series so keep your eyes peeled :)


I hope you enjoy them and i shall be adding more as i go along


Tuesday 13 January 2015

Left Handed Crochet basics- The Slipknot and The Chain Stitch

Okay, this is (hopefully)going to part of a left handed "how to crochet" series going through all of the basics involved in crocheting.
NB: For right- handers follow the same instructions but the other way around :)
First the basic tools to start crocheting is a crochet hook and some yarn, as this is just practice it doesn't matter what size you buy, but i'd suggest a 4 mm hook and double knitting yarn as it easiest to work with as a starters kit, you can buy both of these in any craft shop or yarn shop.
Ready?
Now, almost all crochet starts with a foundation (or base) chain. This is the equivalent of "casting on" in knitting. The foundation chain is a series of chain stitches, which normally begin with a loop secured by a slip knot


The Slipknot

To make a slip knot, grab your yarn, find the end and leaving a 4in tail holding it between your finger and thumb in your left hand, wrap it around the back of your index and middle finger (as shown in the picture) and twist it round.
Once you twist you’ll find a loop, you grab the tail end of the yarn between the fingers that holds the loop,and gently pull it up through the loop and sliding it off your fingers


This is your slipknot.


The Chain Stitch


Slide the knot onto your hook (for right handers hold the hook in the opposite hand.)


Wrap the "working" side of your yarn (the one attached to the ball) around your little finger.
Now take your yarn around the back of all three remaining fingers and it should now be between your index finger and your thumb.


Holding up your index finger slightly, hold the slipknot at the base of the hook between your finger and thumb, and twist your hook slightly to “catch” your yarn and twist again, so the curved end of the hook is facing towards you, and gently pull it through the loop on your hook.
And there you have your first chain stitch.


Raspberry Oatie Bars

  • Now, this is an absolute favourite in my house, perfect for a little snack to go with a cup of tea.

  • 5 tablespoons caster sugar
  • 125g plain flour
  • 1/4 teaspoon bicarbonate of soda
  • pinch salt
  • 100g porridge oats
  • 125g  softened butter
  • 250g  good quality raspberry jam
  1. Preheat oven to 180 C / Gas mark 4. Grease one 20cm (8 inch) square cake tin, and line with baking parchment.
  2. Combine sugar, flour, bicarbonate of soda, salt and porridge oats in a large bowl. Rub in the butter using your hands to form a crumbly mixture.
  3. Press 3/4 of the mixture into the bottom of the prepared cake tin, saving the rest for the topping. Spread the jam over the base but not quite to the edges as it will spread.
  4. Sprinkle the remaining crumb mixture over the top and lightly press it into the jam with a spoon.
  5. Bake for 35 to 40 minutes in preheated oven or until lightly browned. Allow to cool before cutting into slices.
Grab a cup of tea and enjoy!

2 for 1- apple juice and apple pie

Home made apple juice…the epitome of yummyness and that incredible smug “go me! “feeling when you make it:)
you will need:
18 apples (will make 8 cups)
water
a big pot
a bowl or big jug
a potato masher
How to make:
now if you aren’t going to use the pulp for anything then you can just chop your apples without peeling, but if you are going to use the pulp for my next recipe, the apple pies, i suggest peeling, unless, that is, you like the peel in apple pies :).
pop them all into your big “i mean business” pot.
fill with water so it just covers the top of the apples (beware on this part, too much and your apple juice will be too watery)
bring to the boil, then simmer for 20-30 mins.
put a sieve over your bowl or jug and start pouring it all into the sieve, and mash as if your life depends on it!
Once you’ve gotten every single minute droplet out of the pulp, you can put the pulp in a jar and save it as apple sauce by adding a little sugar and cinnamon, or you can use it for the next recipe, apple pies.
Mini Apple Pies:
What you need:
Shortcrust buttery pastry- see my mince pie post for the recipe.
apple pulp
sugar, cinnamon, raisins or whatever else you want for the filling.
a muffin tin
butter or lard for greasing
How to make:
Set your oven to gas mark 6 (or the electric equivalent)
Grease your muffin tin
Roll out your pastry and use a cutter to cut circles for your muffin tin,don’t forget to save some pastry for the lids (or save some and lattice the top instead)
Line your muffin tin with the pastry, add your filling and pop on the pastry lids.
Join together by pressing down with a fork (or a pastry wheel if you’re posh enough to have one)
Brush the tops with egg yolk or milk
pop them in the oven for 20-25minutes
sprinkle the tops with sugar
enjoy with a glass of apple juice